Black Shiplap Wall In Modern (And Vintage!) Master Bedroom
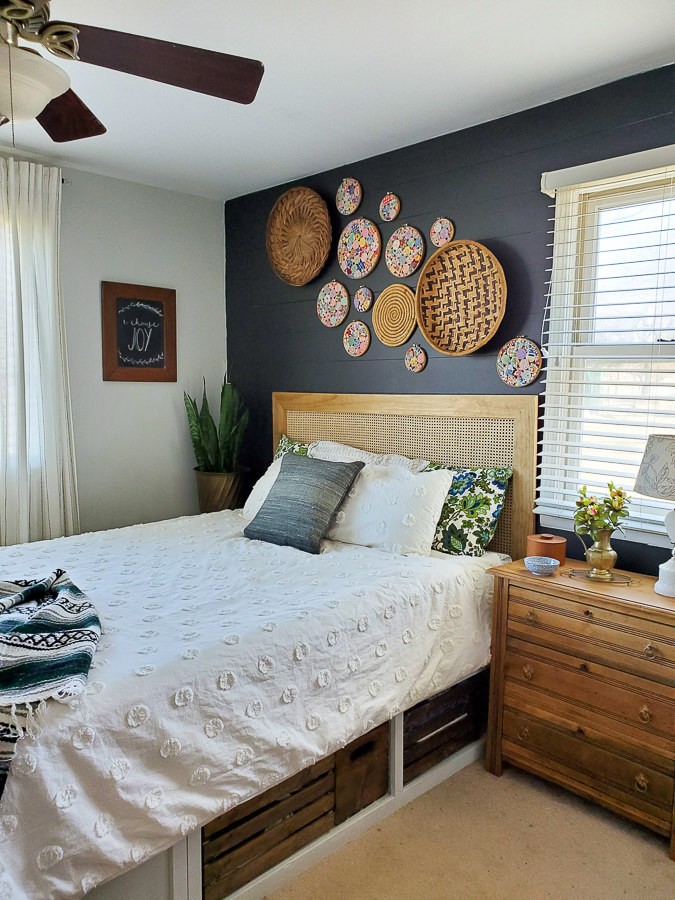
In our newly revamped master bedroom, a striking black shiplap wall and cane headboard provide a sophisticated backdrop for an array of vibrant vintage accessories. This stunning space was transformed on a shoestring budget of less than $100, thanks to creative DIY projects, second-hand finds, and judicious use of paint. Our bedroom had been a neglected space for years, but since the last baby left the nursery, we’re reclaiming it as our own once again.
As a self-proclaimed thrifty decorator, I believe that there’s no sense in buying everything new when you can find, make, or refinish items for a fraction of the cost. That’s why I jumped at the opportunity to participate in the $100 Room Challenge, hosted by Erin from Lemons, Lavender, and Laundry. This bi-annual challenge inspires decorators to get creative with limited budgets.
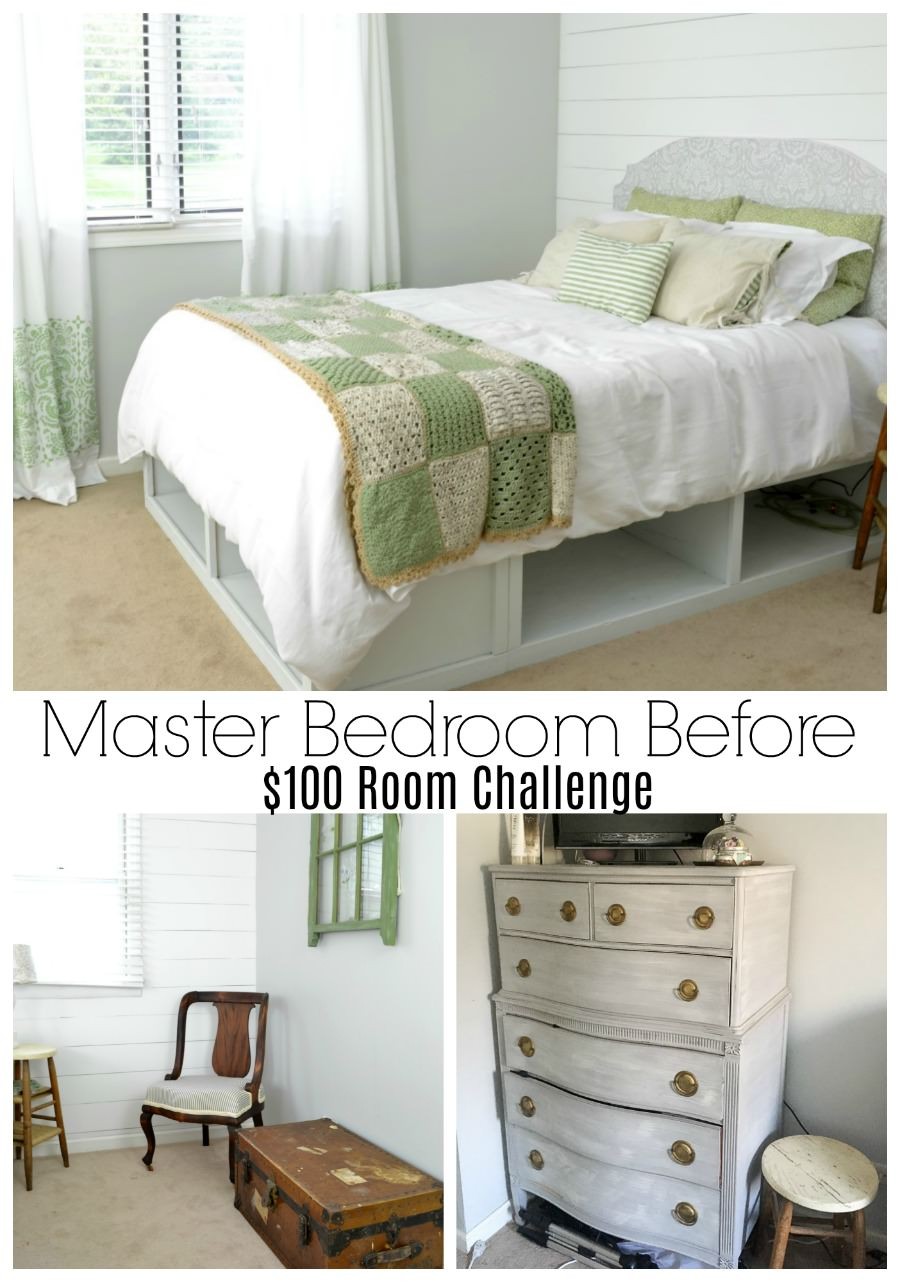
To see how our bedroom transformed from neglected space to modern retreat, let’s take a look at before-and-after photos. The majority of items in this room were sourced second-hand or built/made by me. Here’s a rundown of the main projects that brought this space to life:
Black Shiplap Wall
I initially installed bathroom shiplap several years ago, which inspired me to use the same process to add a shiplap accent wall in my bedroom. This approach struck me as the most effective way to achieve the look of shiplap at an affordable price. Fast forward a couple of years, and I found myself growing tired of the white shiplap’s neutrality. I was eager to introduce some visual interest to the space, which ultimately led me to explore the dramatic impact of black shiplap.
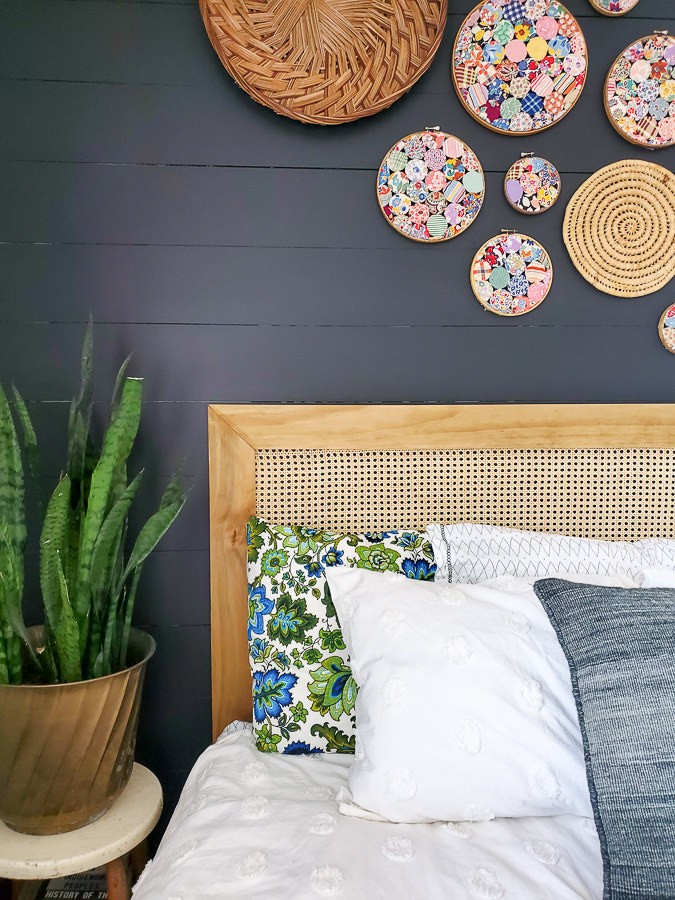
The combination with my cane headboard and vibrant vintage wall hangings – crafted from embroidery hoops and an antique yo-yo quilt top – is a true showstopper.
Refinished Antique Dresser to Natural Wood
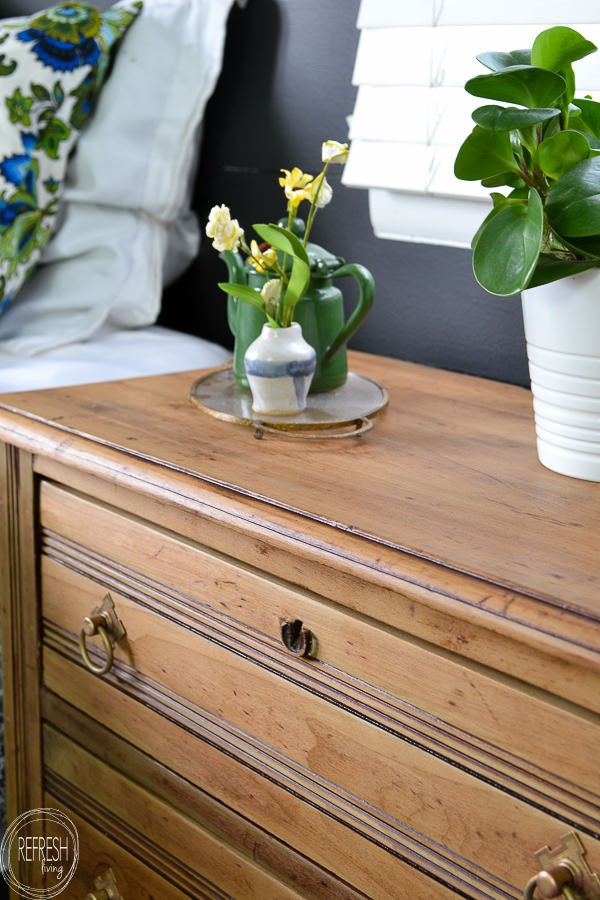
I’m thrilled to share with you the story of my trusty nightstand dresser, which I rescued from a roadside freebie and transformed into a stunning piece of natural wood furniture. To achieve this look, I had to remove the old finish first. If you’re interested in learning how to do the same, I’ve written a detailed guide on [insert link]. With the right techniques and a little elbow grease, you can bring out the beauty of your own pieces and give them new life.
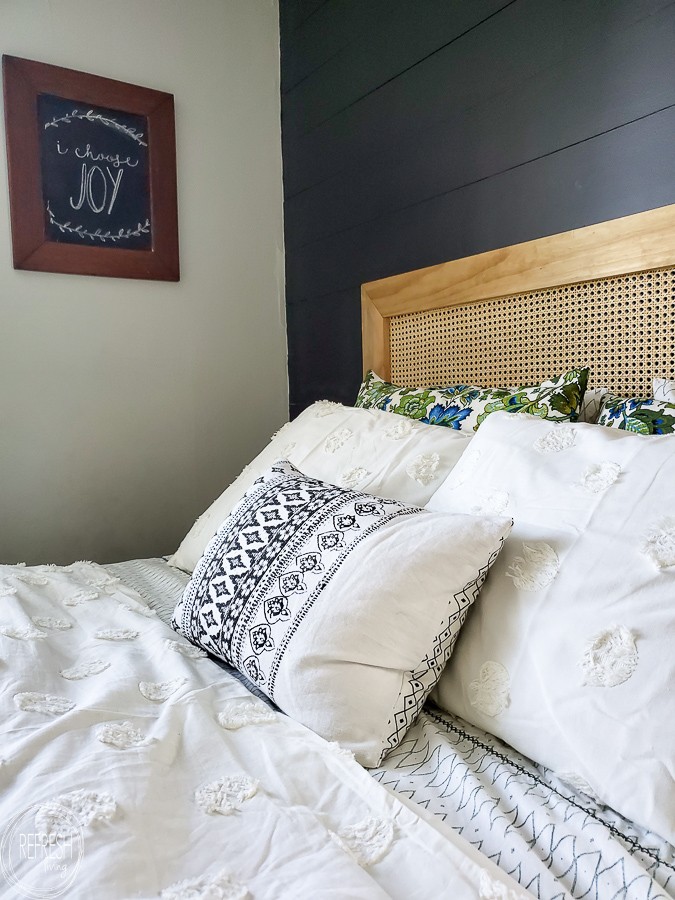
Cane Headboard with Black Shiplap Wall
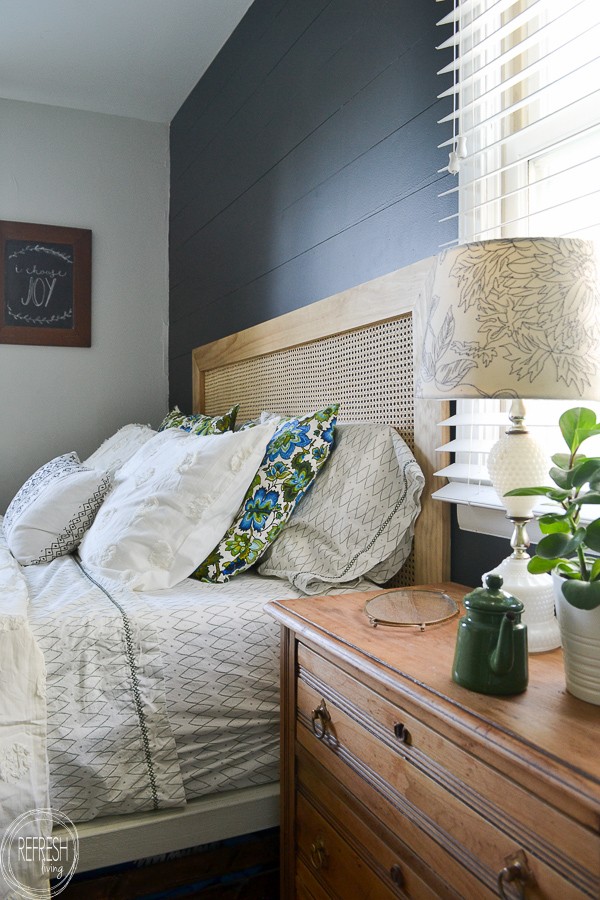
In a creative spin on upcycling, I transformed leftover wood and a sheet of cane into a stunning new headboard for our bedroom. While it’s an impressive piece in its own right, what makes this project truly remarkable is just how effortless it was to create. For those interested in giving it a try, I’ve shared the full tutorial on ‘How to Make a Cane Headboard’, which details every step of the process from start to finish.
DIY Chalk Paint Green Dresser
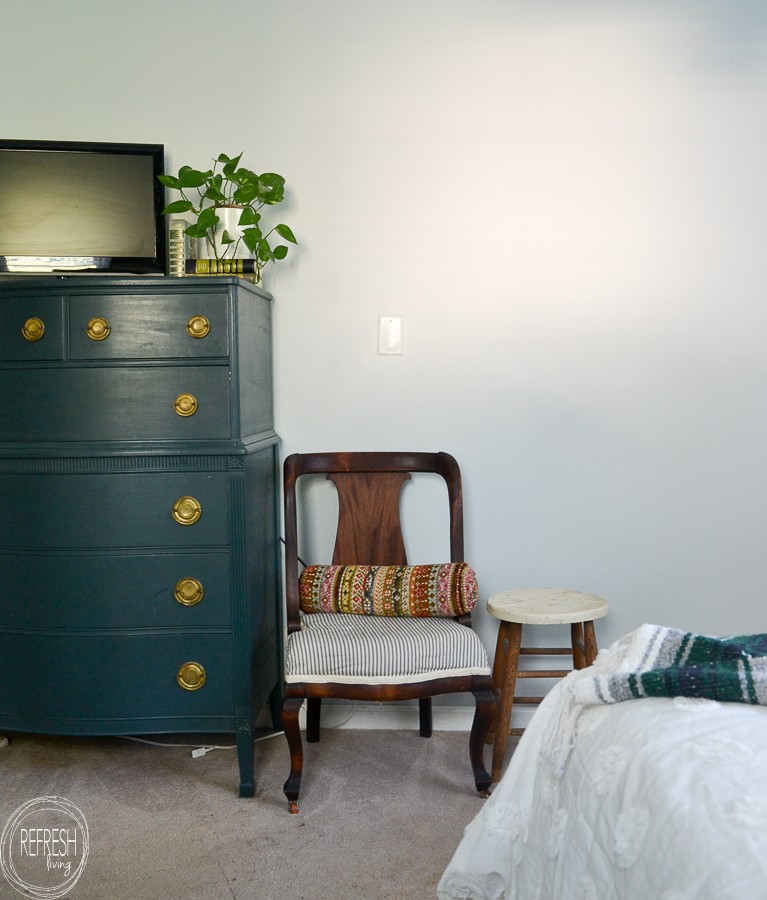
My grandfather’s old dresser received a stunning transformation with the help of DIY chalk paint, which you can learn more about here. The vintage chair, on the other hand, had an unexpected beginning – it was discovered in the garage of an estate sale several years ago, sans seat. The bargain hunter in me couldn’t resist the opportunity to score it for a mere few dollars.
After some trial and error, I successfully crafted a custom seat, ultimately turning this thrifted find into a gorgeous piece that cost almost nothing.
Kids’ Art Wall Display
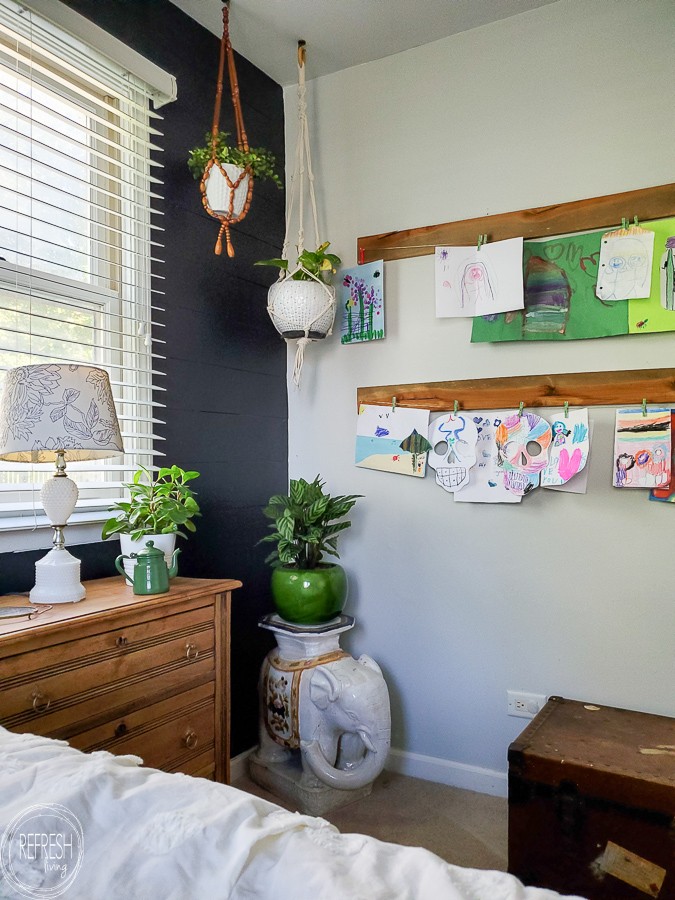
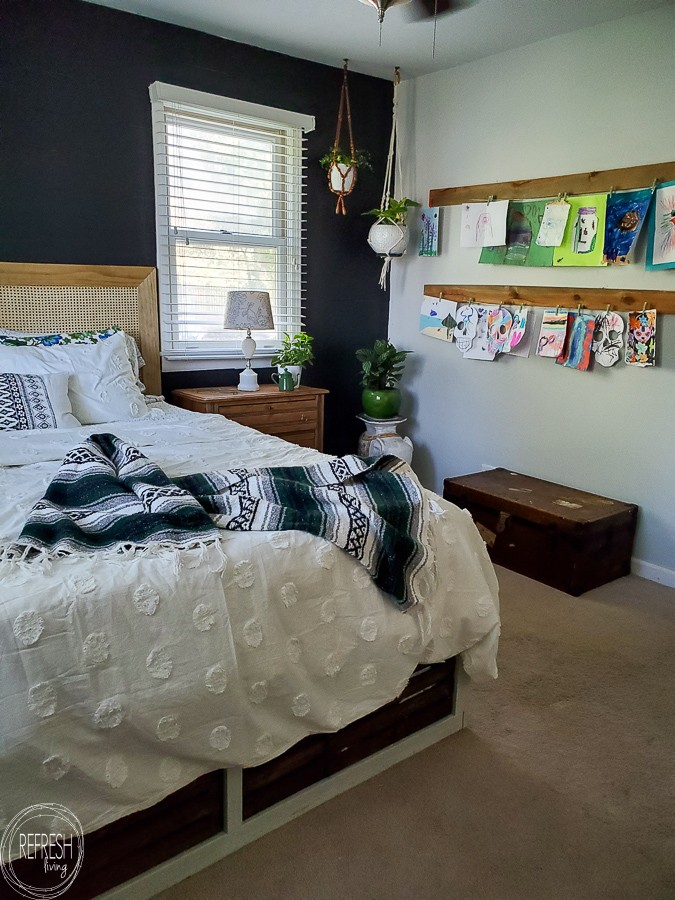
In my cozy bedroom corner, I’ve curated a special spot that’s full of sentimental value. The elephant figurine and green planter are treasured garage sale finds passed down from my grandfather. I crafted the white plant hanger using clothesline cord and repurposed a vintage beaded hanger for just $2! My kids adore sharing their artwork with me, but our fridge can only hold so much. This display area allows them to showcase their masterpieces while I wake up to their sweet gestures every morning.
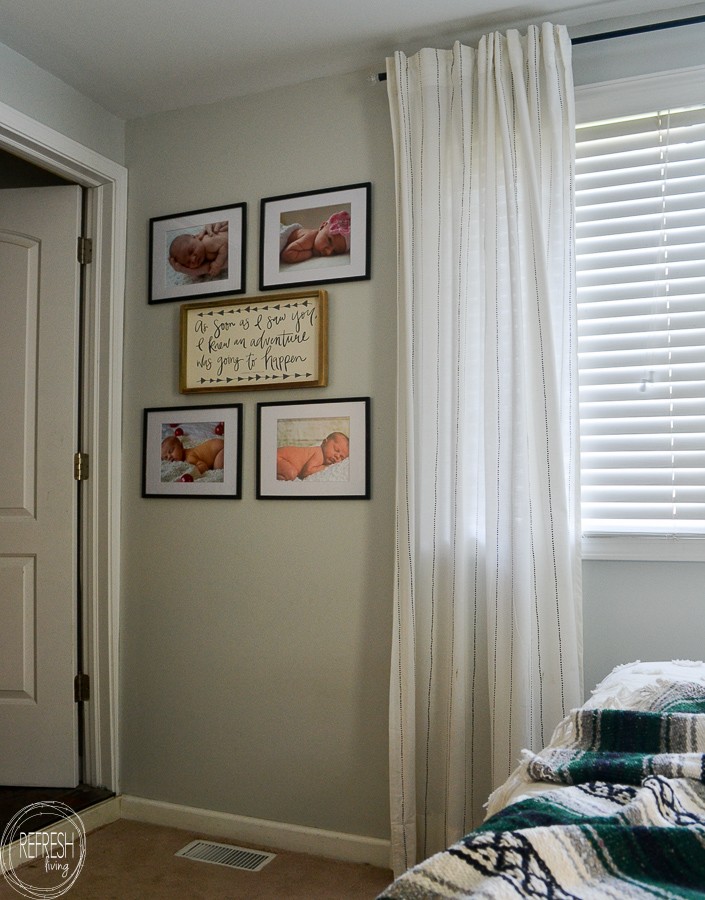
They love climbing on the wooden trunk, carefully selecting a piece to swap out, and adding new art to the collection. Best of all, it was a free project, utilizing scrap wood from the garage, mini clothespins from another DIY venture, and gold wire purchased on clearance years ago. It’s a haven where I can proudly display my little ones’ newborn photos in frames bought for just $0.25 each at an estate sale.
As for the room’s budget breakdown, here’s how I allocated the $100: new curtains ($20), paint for the wall and dresser/framing ($8 + $0 = $8), vintage fabric for shams ($2), a new duvet cover ($40), caning for the headboard ($30), four picture frames ($1), and a vintage plant hanger ($2). With some leftover materials from other projects, I stayed within my budget of $100. It’s amazing how much character and charm this little corner has brought to our bedroom!